
Create a Blazor Server CRUD Application with EF Core and DB2 for i (IBM i)
Introduction
This tutorial shows how to build a Blazor Server application connected to a DB2 for i database through NTi's Entity Framework Core extension, compatible with .NET 8, .NET 9 and .NET 10.
The goal is to set up a complete CRUD for managing products, categories and orders from a modern .NET web application.
This approach lets you use EF Core on the IBM i to simplify data access and speed up business application development.
The commands in this tutorial target .NET 8. For .NET 9 or .NET 10, just swap the framework version and the package versions given in step 1. On the server side, NTi's EF Core add-on requires IBM i 7.2 or later.
Step 1 - Create and configure the project
Create the project from the command line:
dotnet new blazor -n myApp -f net8.0 -int Server
cd myApp
💡 The
blazorservertemplate no longer exists as of .NET 8. Theblazortemplate with the-int Serveroption (Server interactivity) creates a Blazor Web App with equivalent behavior, with pages underComponents/Pages. For .NET 9 or .NET 10, replacenet8.0withnet9.0ornet10.0.
Add the required packages:
dotnet add package Aumerial.Data.Nti
dotnet add package Aumerial.EntityFrameworkCore --version 8.5.0
dotnet add package Microsoft.EntityFrameworkCore.Design --version 8.0.*
The Aumerial.EntityFrameworkCore version is chosen to match the targeted EF Core version: the major version tracks EF Core, the minor version tracks the NTi generation.
| Target | Aumerial.EntityFrameworkCore | Microsoft EF Core packages |
|---|---|---|
| .NET 8 (EF Core 8) | 8.5.0 |
8.0.* |
| .NET 9 (EF Core 9) | 9.5.0 |
9.0.* |
| .NET 10 (EF Core 10) | 10.5.0 |
10.0.* |
💡 All three versions rely on the
Aumerial.Data.Nti5.0.0 ADO.NET provider, installed automatically as a dependency if you skip the first command.
Add the connection string to appsettings.json, specifying the default schema (the library) where all created entities will be placed:
{
    "ConnectionStrings": {
        "DefaultConnection": "server=Server;user=User;password=Pwd;database=Db;pooling=true"
    }
}
💡 Connection pooling is off by default.
pooling=trueis recommended for any web application.
Step 2 - Define the entities
Create a Models folder and add the following classes:
Category.cs
A category can hold several products:
public class Category
{
    public int Id { get; set; }
    public string Name { get; set; }
    public ICollection Products { get; set; }
}
Product.cs
A product belongs to a category and can be linked to several orders:
public class Product
{
    public int Id { get; set; }
    public string Name { get; set; }
    public string Description { get; set; }
    public decimal Price { get; set; }
    public int StockQuantity { get; set; }
    public decimal Weight { get; set; }
    public bool IsAvailable { get; set; }
    public int CategoryId { get; set; }
    public Category Category { get; set; }
    public ICollection Orders { get; set; } = new List();
}
Order.cs
An order can contain several products:
public class Order
{
    public int Id { get; set; }
    public DateTime OrderDate { get; set; }
    public DateTime? DeliveryDate { get; set; }
    public decimal TotalAmount { get; set; }
    public ICollection Products { get; set; }
}
Step 3 - Configure the DbContext
Add an AppDbContext class inheriting from DbContext to manage the entities and their relationships:
using Microsoft.EntityFrameworkCore;
public class AppDbContext : DbContext
{
    public AppDbContext(DbContextOptions options) : base(options) { }
    public DbSet Products { get; set; }
    public DbSet Categories { get; set; }
    public DbSet Orders { get; set; }
    protected override void OnModelCreating(ModelBuilder modelBuilder)
    {
    }
}
Step 4 - Configure Program.cs
Configure the DbContext in Program.cs and register it as a service through dependency injection for your Blazor components. Add using Aumerial.EntityFrameworkCore; at the top of the file to make the UseNTi method available:
using Aumerial.EntityFrameworkCore;
var builder = WebApplication.CreateBuilder(args);
var connectionString = builder.Configuration.GetConnectionString("DefaultConnection");
builder.Services.AddDbContext(options =>
    options.UseNTi(connectionString));
💡
AddDbContextis recommended for most Blazor Server applications. TheDbContextis instantiated with a Scoped lifetime, recreated on every user request. UseAddDbContextFactoryfor background work or multi-threaded processing (see the Microsoft documentation).
Step 5 - Create and manage migrations
Generate an initial migration to create the tables in the database. This command creates a file in the Migrations folder containing the SQL statements needed to create your tables:
dotnet ef migrations add InitialCreateThen apply the migration:
dotnet ef database update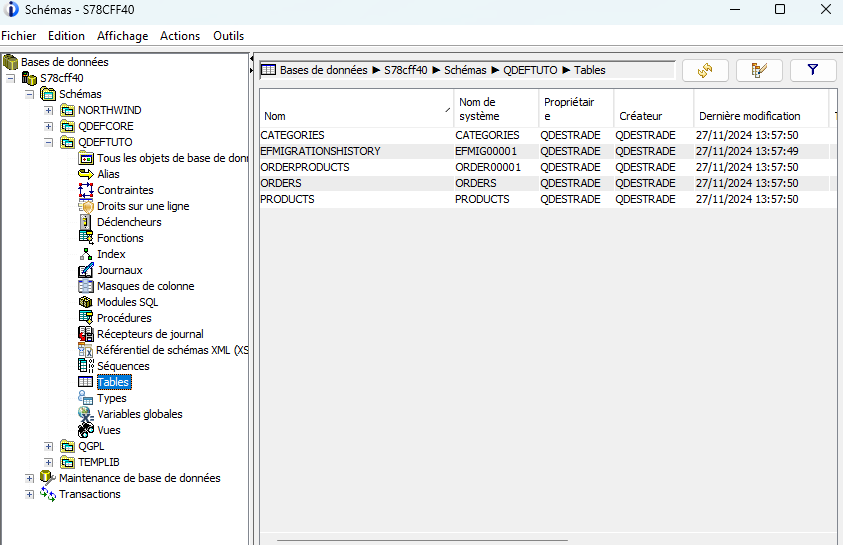
To add or change a table, create or edit the relevant entity, add it to AppDbContext if needed, then generate a new migration:
dotnet ef migrations add MyNewMigration
dotnet ef database update
To remove the last migration before it has been applied:
dotnet ef migrations removeTo roll the database back to an earlier version:
dotnet ef database update MigrationName💡 Replace
MigrationNamewith the name of the migration you want to roll back to.
Step 6 - Add seed data
Add seed data in Program.cs, after var app = builder.Build();:
using (var scope = app.Services.CreateScope())
{
    var context = scope.ServiceProvider.GetRequiredService();
    var categories = new List
    {
        new Category { Name = "Electronics" },
        new Category { Name = "Books" },
        new Category { Name = "Home Appliances" },
        new Category { Name = "Fashion" },
        new Category { Name = "Toys" }
    };
    context.Categories.AddRange(categories);
    var products = new List
    {
        new Product { Name = "Smartphone", Price = 500, StockQuantity = 10, Category = categories[0], IsAvailable = true },
        new Product { Name = "Laptop", Price = 1200, StockQuantity = 5, Category = categories[0], IsAvailable = true },
        new Product { Name = "Washing Machine", Price = 300, StockQuantity = 8, Category = categories[2], IsAvailable = true },
        new Product { Name = "T-Shirt", Price = 20, StockQuantity = 50, Category = categories[3], IsAvailable = true },
        new Product { Name = "Children's Book", Price = 15, StockQuantity = 100, Category = categories[1], IsAvailable = true },
        new Product { Name = "Toy Car", Price = 30, StockQuantity = 20, Category = categories[4], IsAvailable = true },
        new Product { Name = "Microwave Oven", Price = 250, StockQuantity = 6, Category = categories[2], IsAvailable = true },
        new Product { Name = "Jeans", Price = 40, StockQuantity = 30, Category = categories[3], IsAvailable = true }
    };
    context.Products.AddRange(products);
    var orders = new List
    {
        new Order
        {
            OrderDate = DateTime.Now.AddDays(-10),
            DeliveryDate = DateTime.Now.AddDays(-7),
            TotalAmount = 750,
            Products = new List { products[0], products[1], products[3] }
        },
        new Order
        {
            OrderDate = DateTime.Now.AddDays(-5),
            DeliveryDate = DateTime.Now.AddDays(-3),
            TotalAmount = 600,
            Products = new List { products[4], products[5], products[6] }
        },
        new Order
        {
            OrderDate = DateTime.Now.AddDays(-2),
            DeliveryDate = null,
            TotalAmount = 290,
            Products = new List { products[2], products[7] }
        }
    };
    context.Orders.AddRange(orders);
    await context.SaveChangesAsync();
}
💡
SaveChangesAsyncis the standard path with NTi. Async is genuine end-to-end here, with no sync-over-async. The synchronousSaveChangesis still available.
Step 7 - Scaffold the CRUD pages
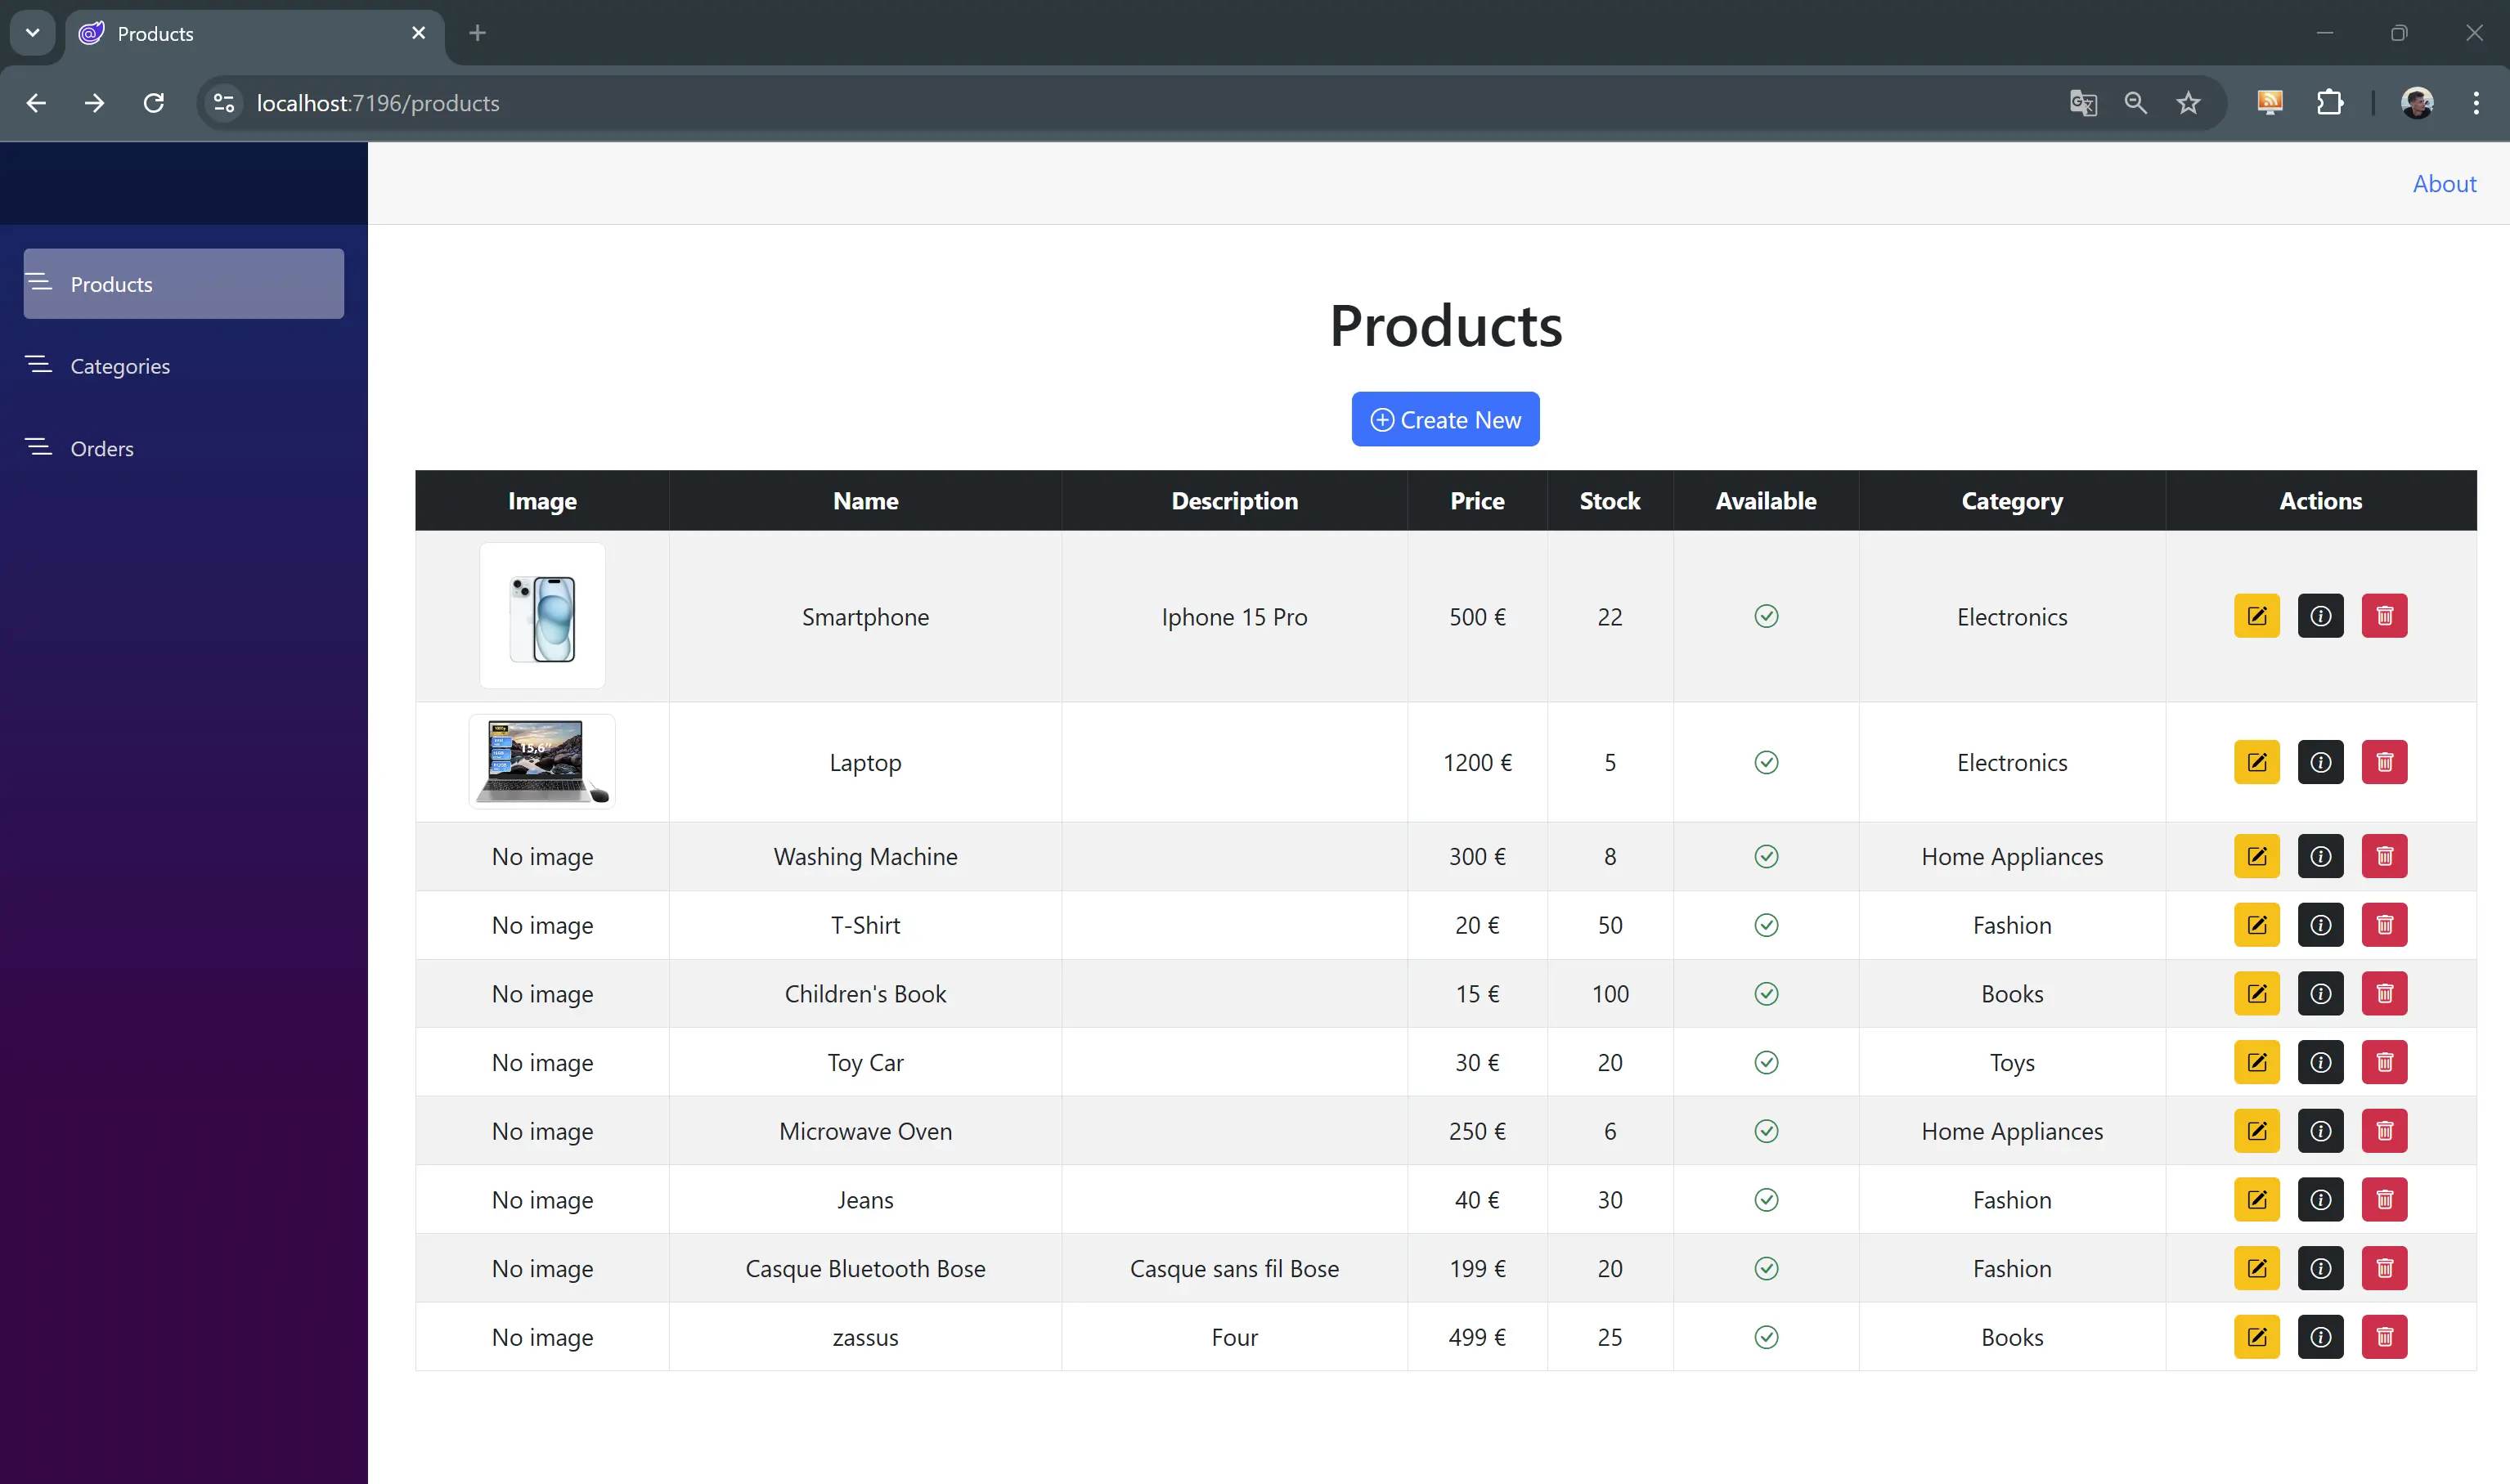
Visual Studio can automatically scaffold the CRUD Razor components for each of your entities in a few clicks.
- Right-click the Components/Pages folder in your project
- Select Add > New Scaffolded Item > Razor Components using Entity Framework (CRUD)
- Set the options:
- Model class: pick the entity you want (e.g.
Product) - DbContext class: select
AppDbContext
- Model class: pick the entity you want (e.g.
Visual Studio generates a set of CRUD Razor components in a dedicated folder (e.g. Components/Pages/ProductPages):
Index.razor- list of recordsCreate.razor- add formEdit.razor- edit formDetails.razor- single record detail viewDelete.razor- confirmation and deletion
Repeat the process for each entity: Category, Order.
Step 8 - Add an image field (BLOB)
Add an Image field of type byte[] to the Product entity:
using System.ComponentModel.DataAnnotations;
using System.ComponentModel.DataAnnotations.Schema;
public class Product
{
    public int Id { get; set; }
    public string Name { get; set; }
    public string Description { get; set; }
    public decimal Price { get; set; }
    public int StockQuantity { get; set; }
    public decimal Weight { get; set; }
    public bool IsAvailable { get; set; }
    public int CategoryId { get; set; }
    public Category Category { get; set; }
    public ICollection Orders { get; set; } = new List();
    [Column(TypeName = "BLOB(1M)"), DataType(DataType.Upload)]
    public byte[] Image { get; set; }
}
Generate and apply the migration:
dotnet ef migrations add AddProductImage
dotnet ef database update
Then edit the Components/Pages/ProductPages/Create.razor and Edit.razor components to add the upload field:
<div class="mb-3">
    <label for="image" class="form-label">Image:</label>
    <InputFile id="image" OnChange="UploadFile" class="form-control" />
    @if (Product?.Image != null && Product.Image.Length > 0)
    {
        <p>Current image:</p>
        <img src="data:image/jpeg;base64,@Convert.ToBase64String(Product.Image)"
             style="max-width: 200px; max-height: 200px;" />
    }
    else
    {
        <p>No image available</p>
    }
</div>
And the method that handles the upload:
private async Task UploadFile(InputFileChangeEventArgs e)
{
    var file = e.File;
    if (file != null)
    {
        using var memoryStream = new MemoryStream();
        await file.OpenReadStream().CopyToAsync(memoryStream);
        Product.Image = memoryStream.ToArray();
    }
}
What's next?
- Entity Framework Core : configuration, data types and migrations
- Identity authentication : secure the application with ASP.NET Core Identity stored in DB2 for i
- Connection : connection string, pooling, MFA
- Quickstart guide : first connection and first IBM i calls